Computer Setup
Before we get started, we need to install Visual Studio on our computers. I put together this guide which walks you through downloading and installing Visual Studio. The process will likely take close to an hour. If you get stuck at any point, feel free to either call me at (732) 290-5703 or email me at info@lakewoodprogramming.com.
IMPORTANT: If you have a filter installed, you must disable it while installing Visual Studio. In almost all cases, Visual Studio will not install properly with a filter turned on. Please make sure to turn it off before starting the installation, and only re-enable it after the setup is complete.
Step 1
To get started, click the link below to go to Microsoft's website where you can download Visual Studio:
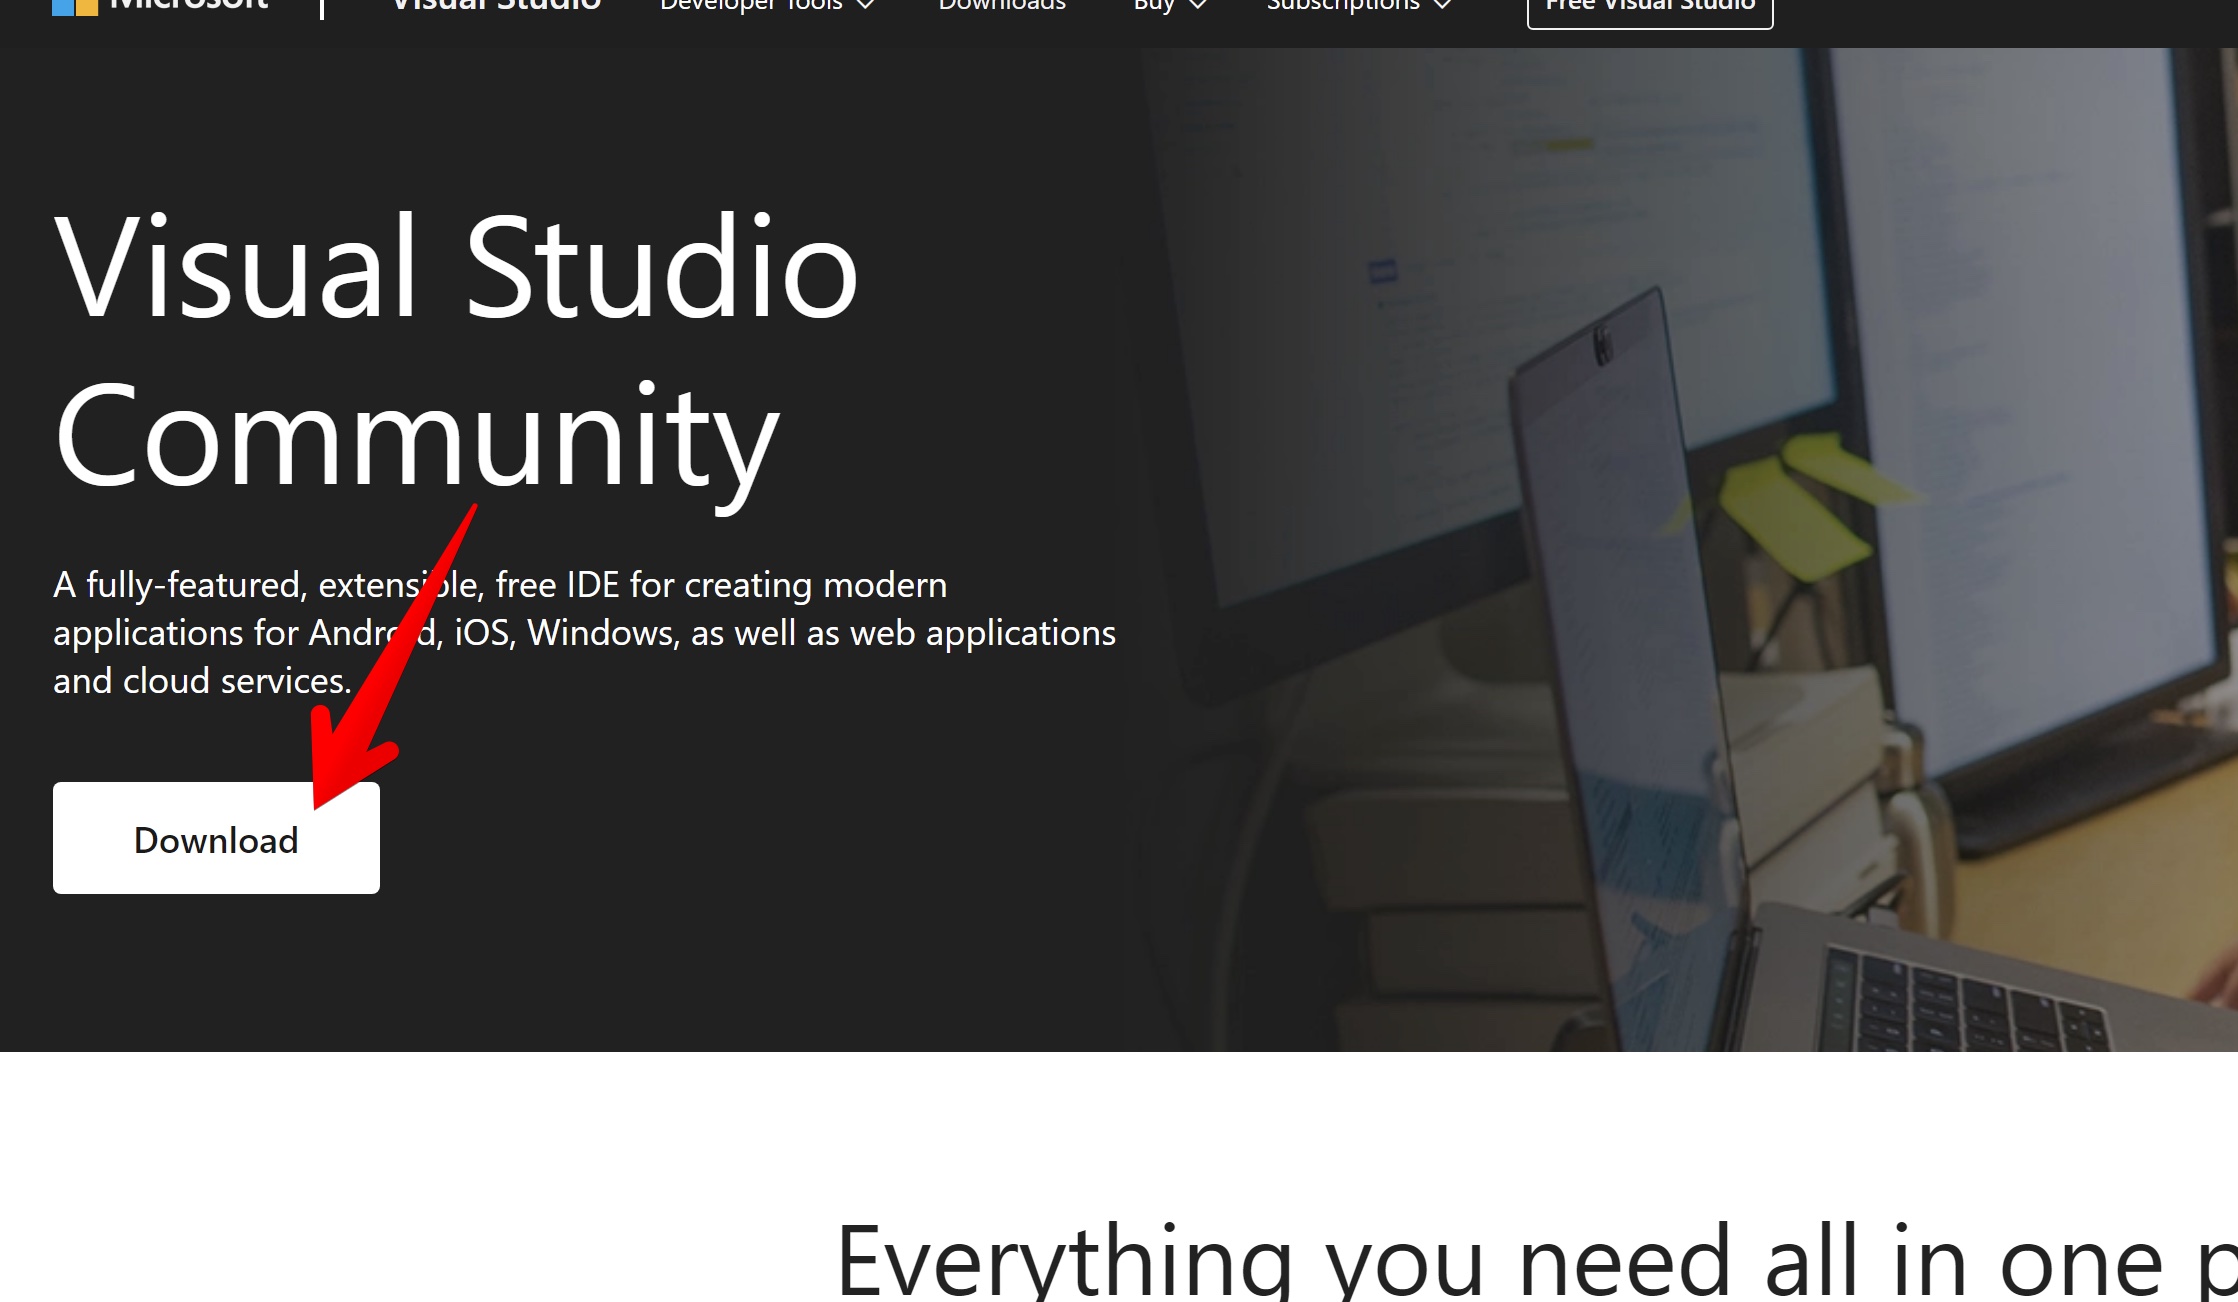
Click here to go to Microsofts Visual Studio Download PageOnce there, hover over the **Download Visual Studio** button and click **Community 2022**:
Step 2
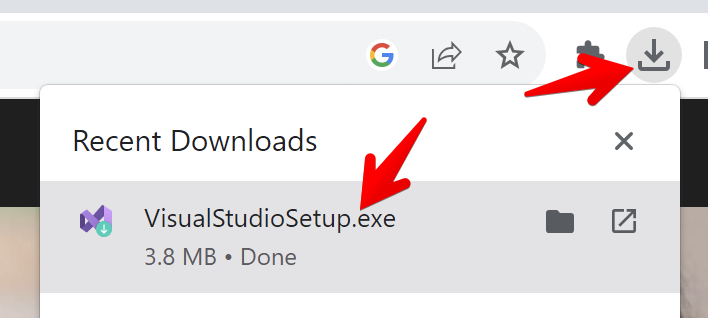
This will start a short download of the Visual Studio Installer. Click on the top right downloads icon, and click on the VisualStudioSetup when it's done:
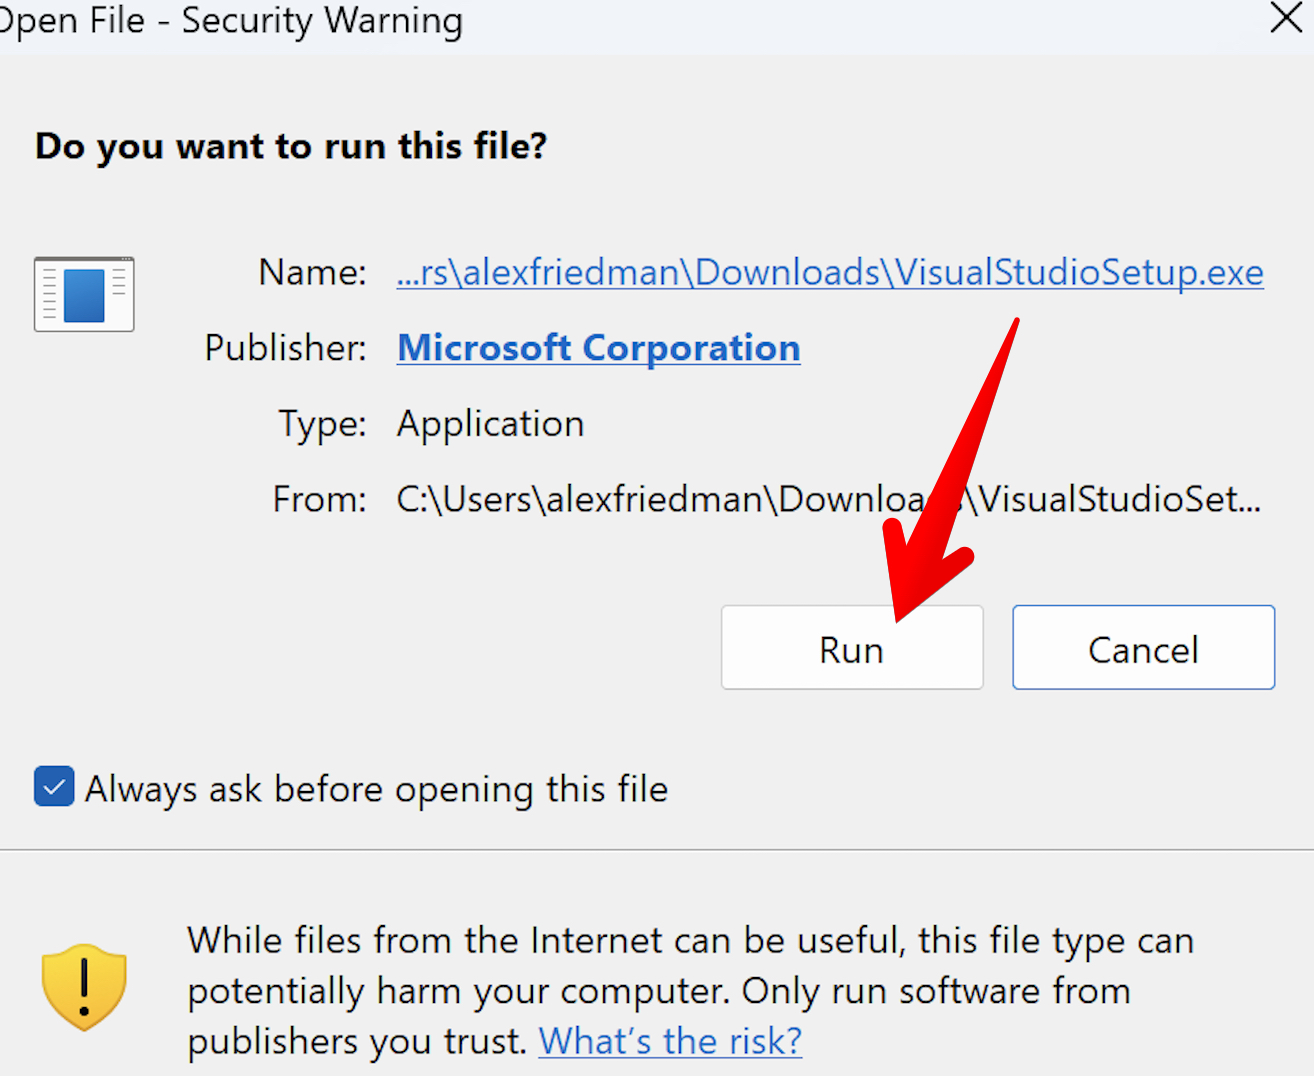
Once that's done, launch the installer by clicking on it, at which point you might see this familiar dialog. Click **Run** to start it:
This will start the Visual Studio installer, go ahead and click **Continue**:

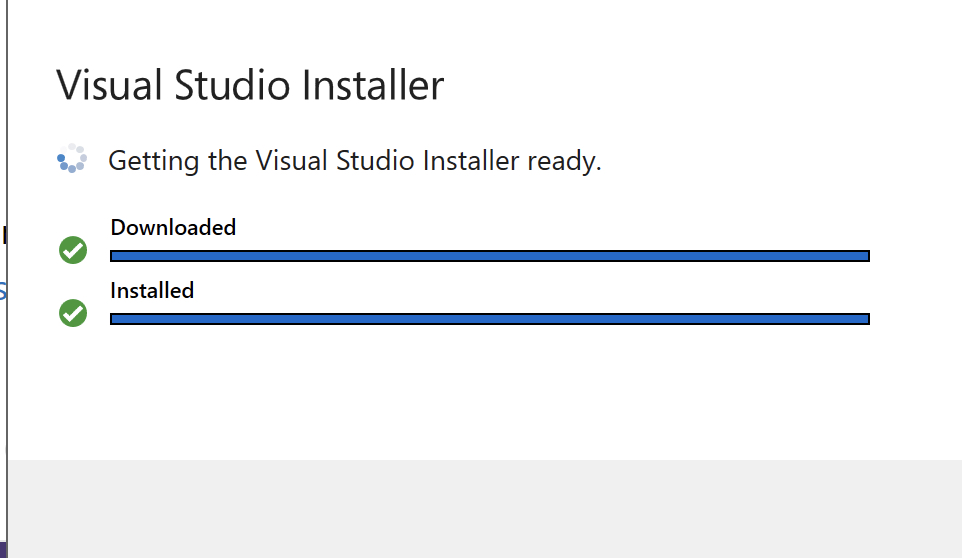
The installer should then kick off and will look like this:
Step 3
Once that's done, you'll see a screen that looks like the one below. Make sure to check off the options as shown here (**.NET desktop development** and **ASP.NET and web development**) and to uncheck the checkboxes on the right as shown here:
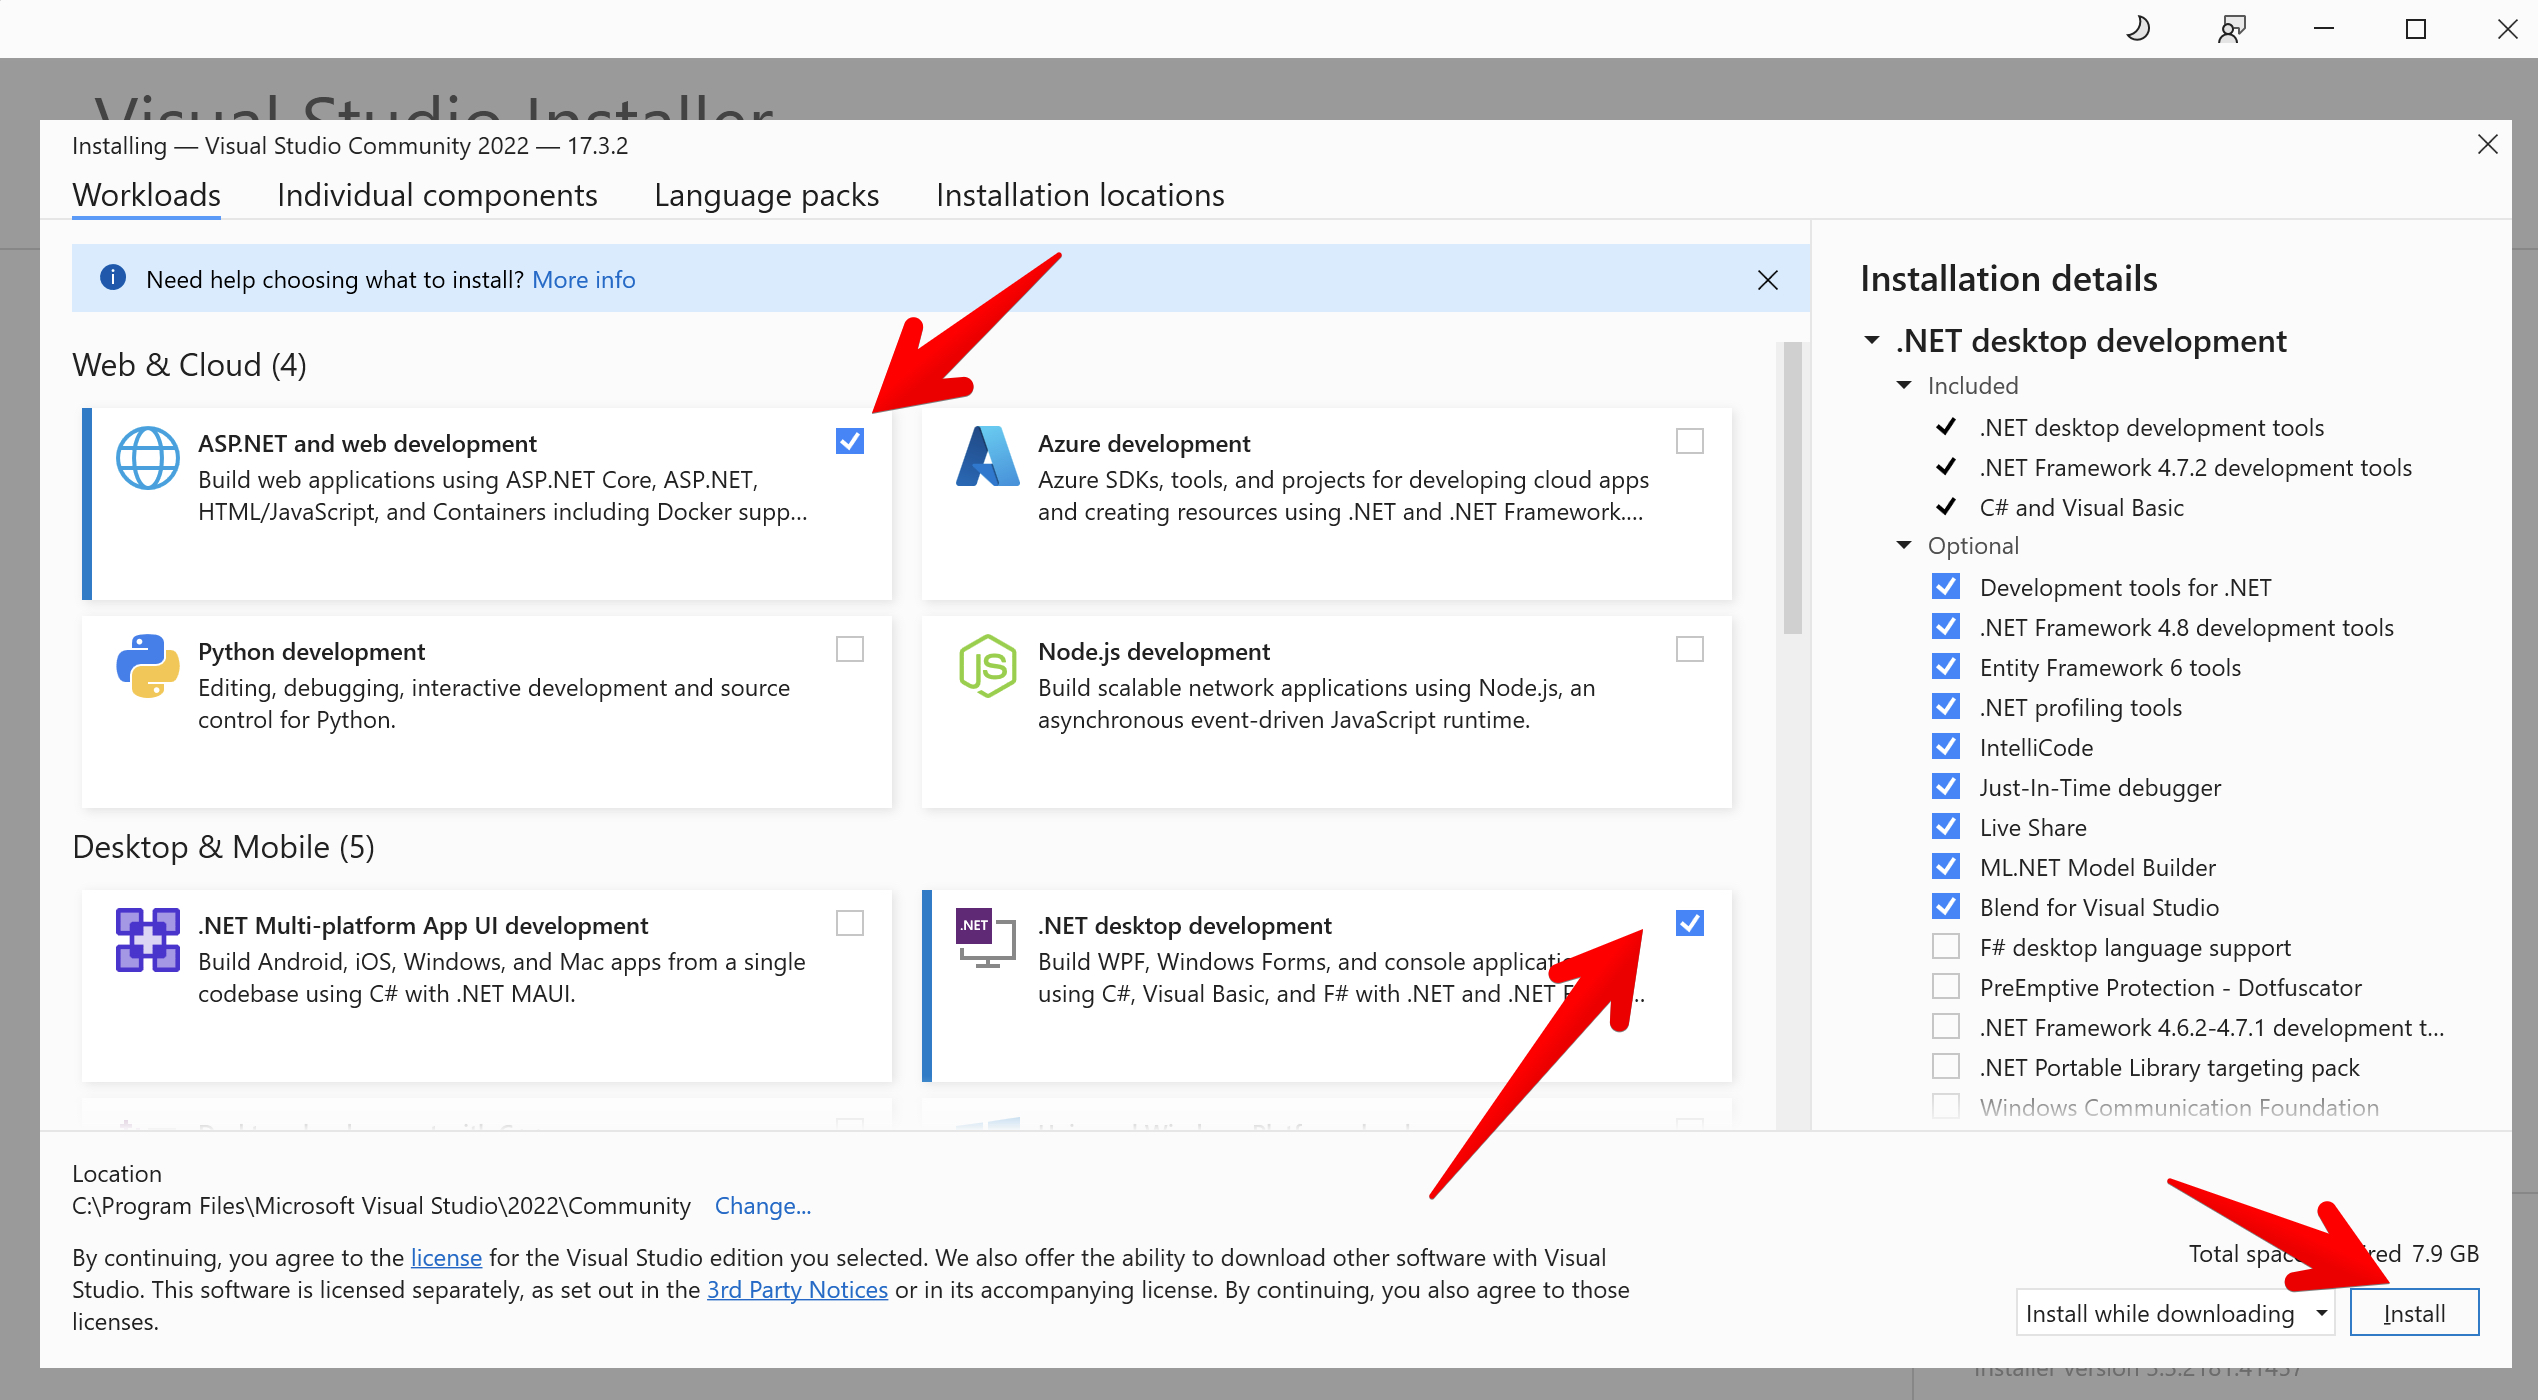
Then click on the **Install** button on the bottom right as shown above.
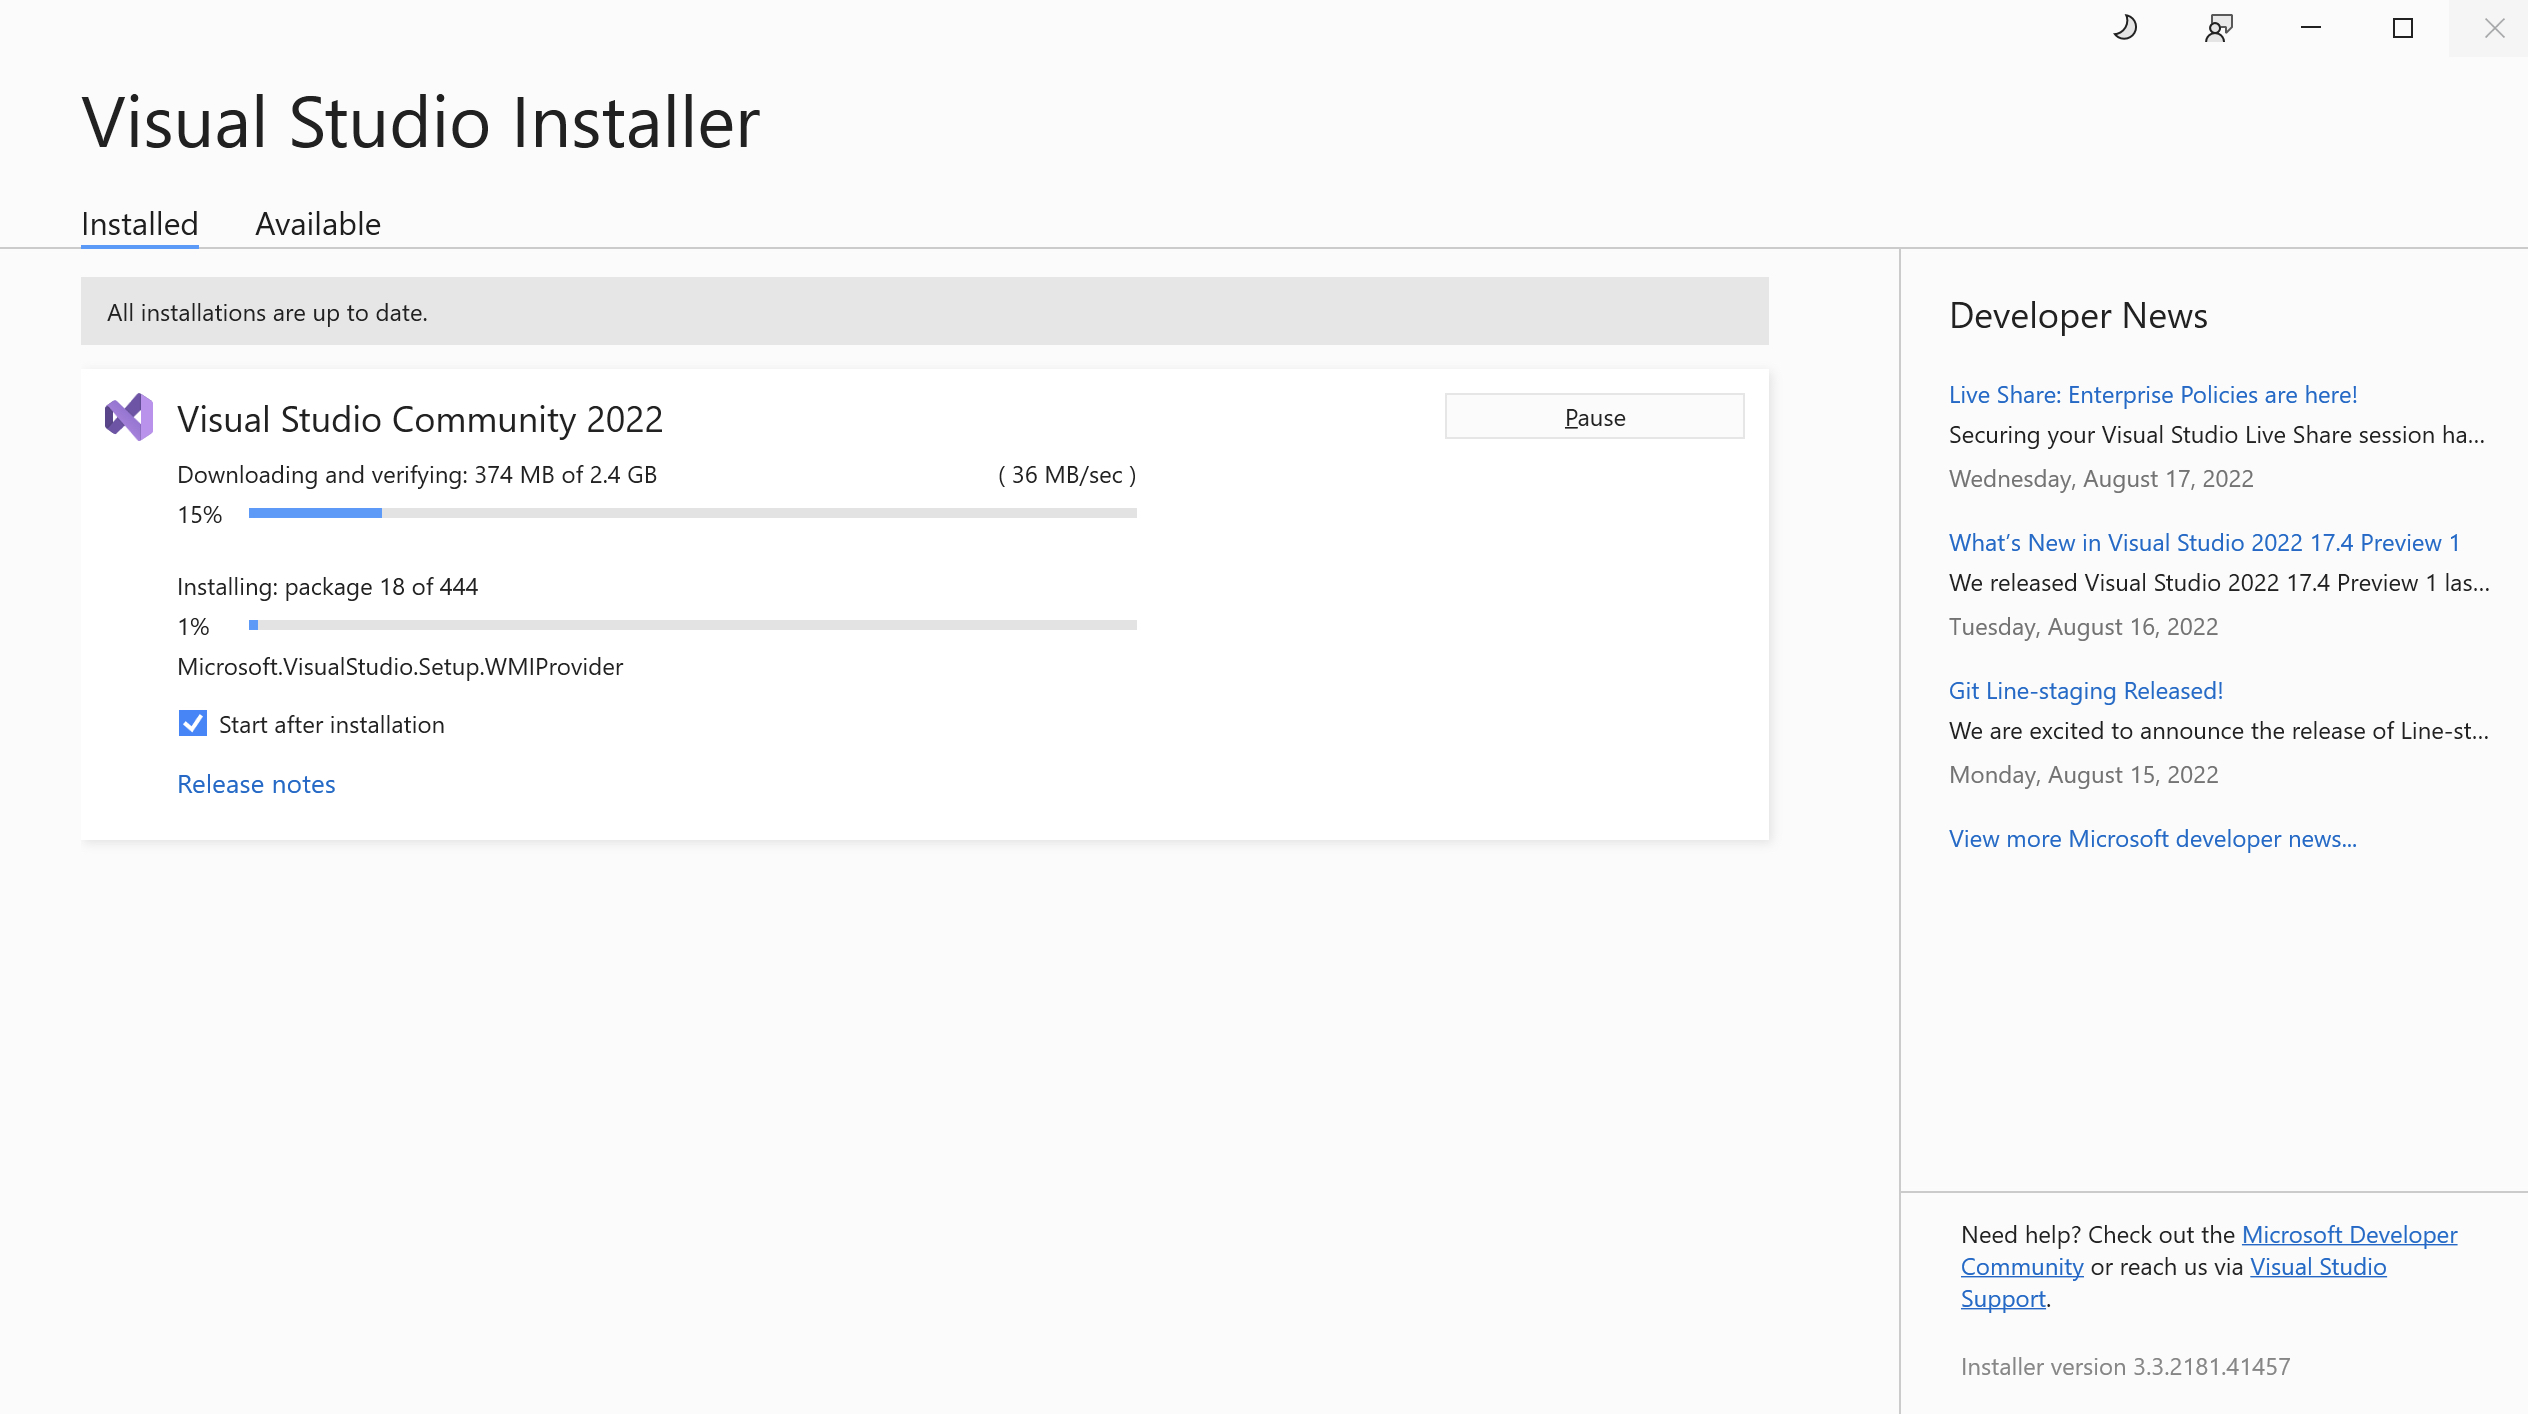
Now go make yourself a sandwhich and sit tight. This next step takes quite a while during which your screen will look something like this:
Step 4
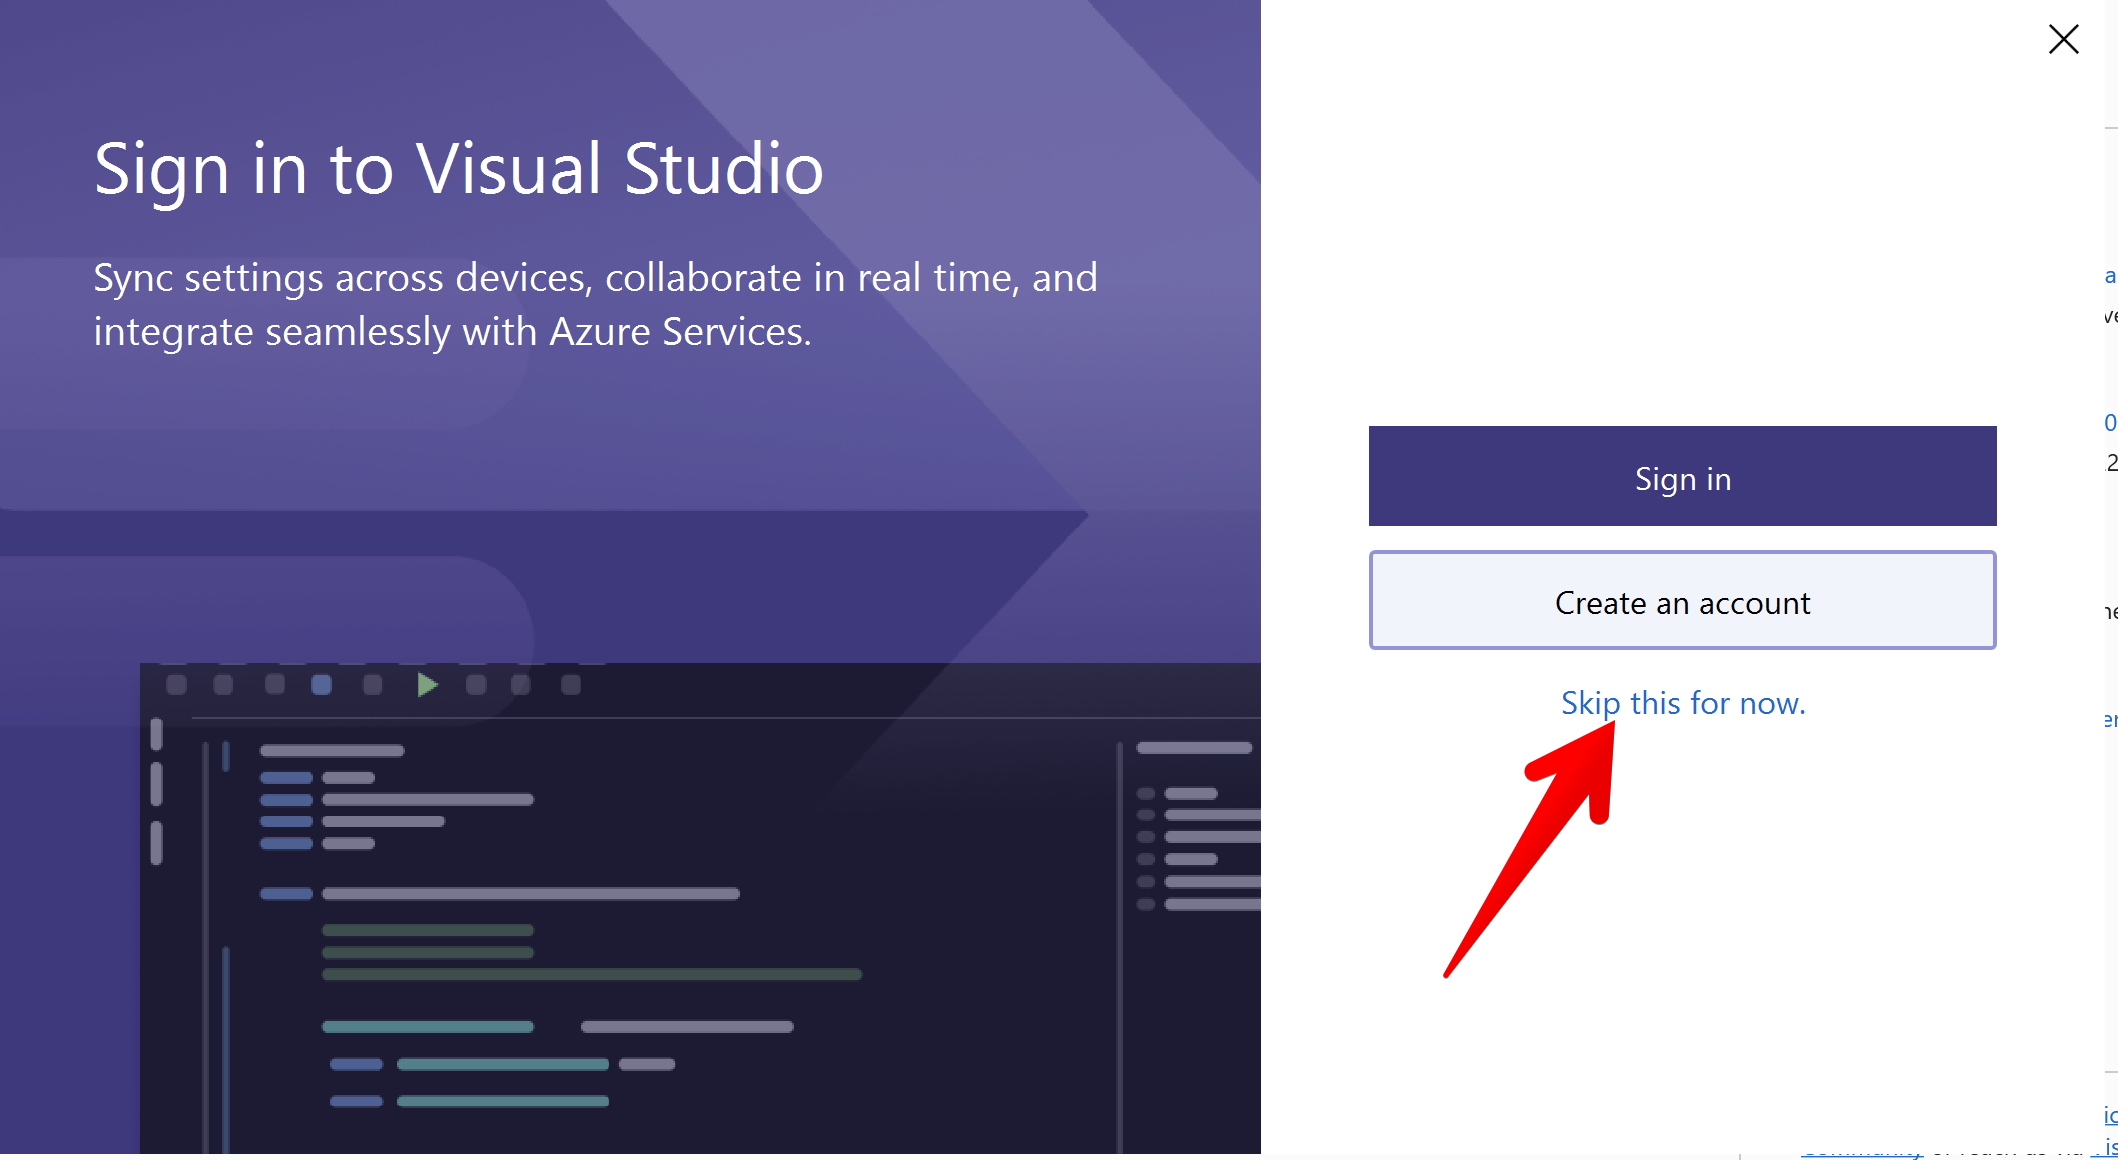
Ok, once it's done (how was that sandwhich by the way? Don't forget to bentch!) you should be greeted with the following screen. Click the **Skip and add accounts later.** link:
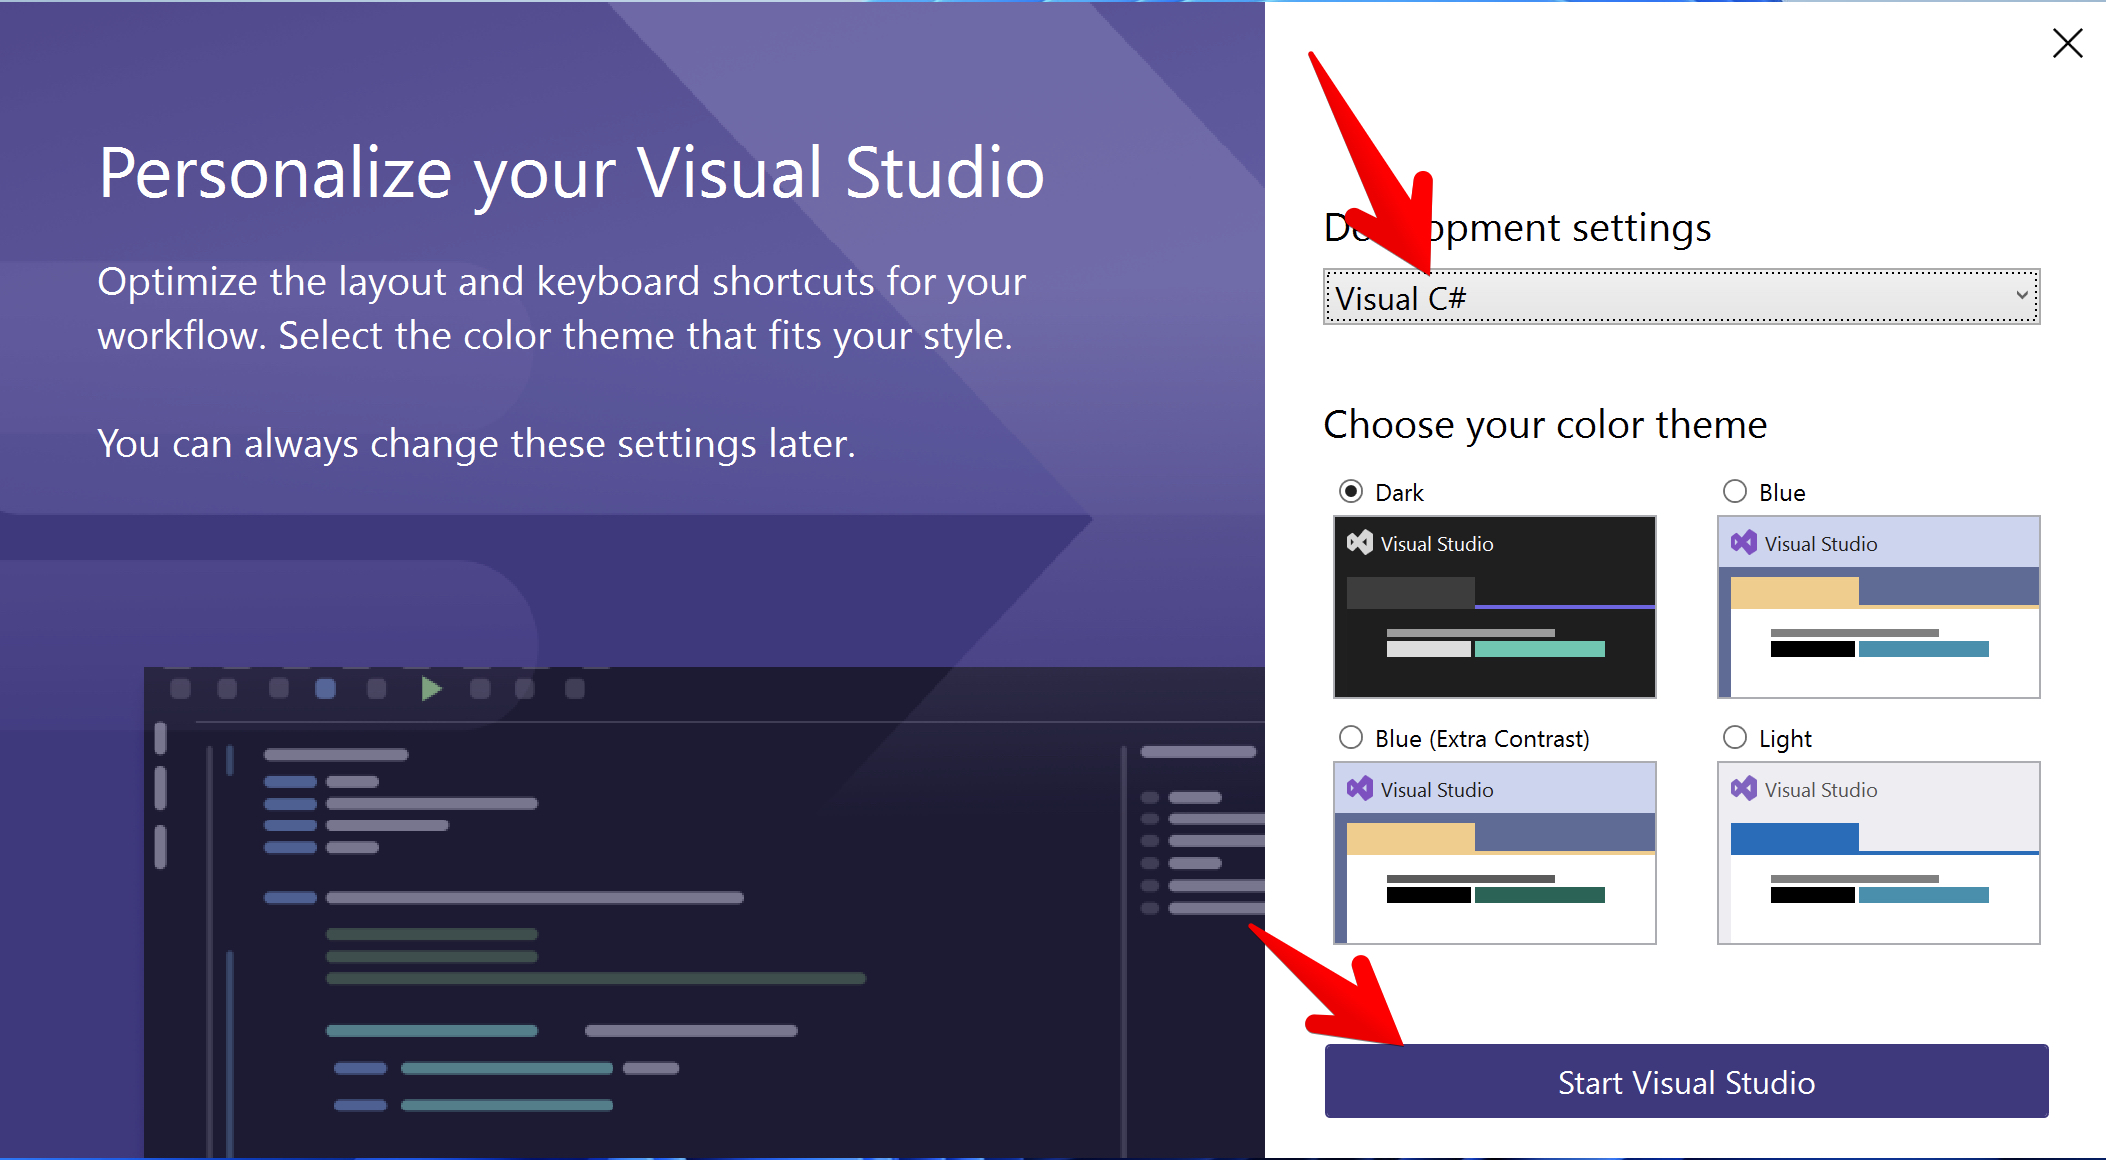
Once that's done, you should see the following dialog. Choose **Visual C#** for Development Settings, and feel free to choose whichever color theme you want (it can always be changed later) and then click **Start Visual Studio**:
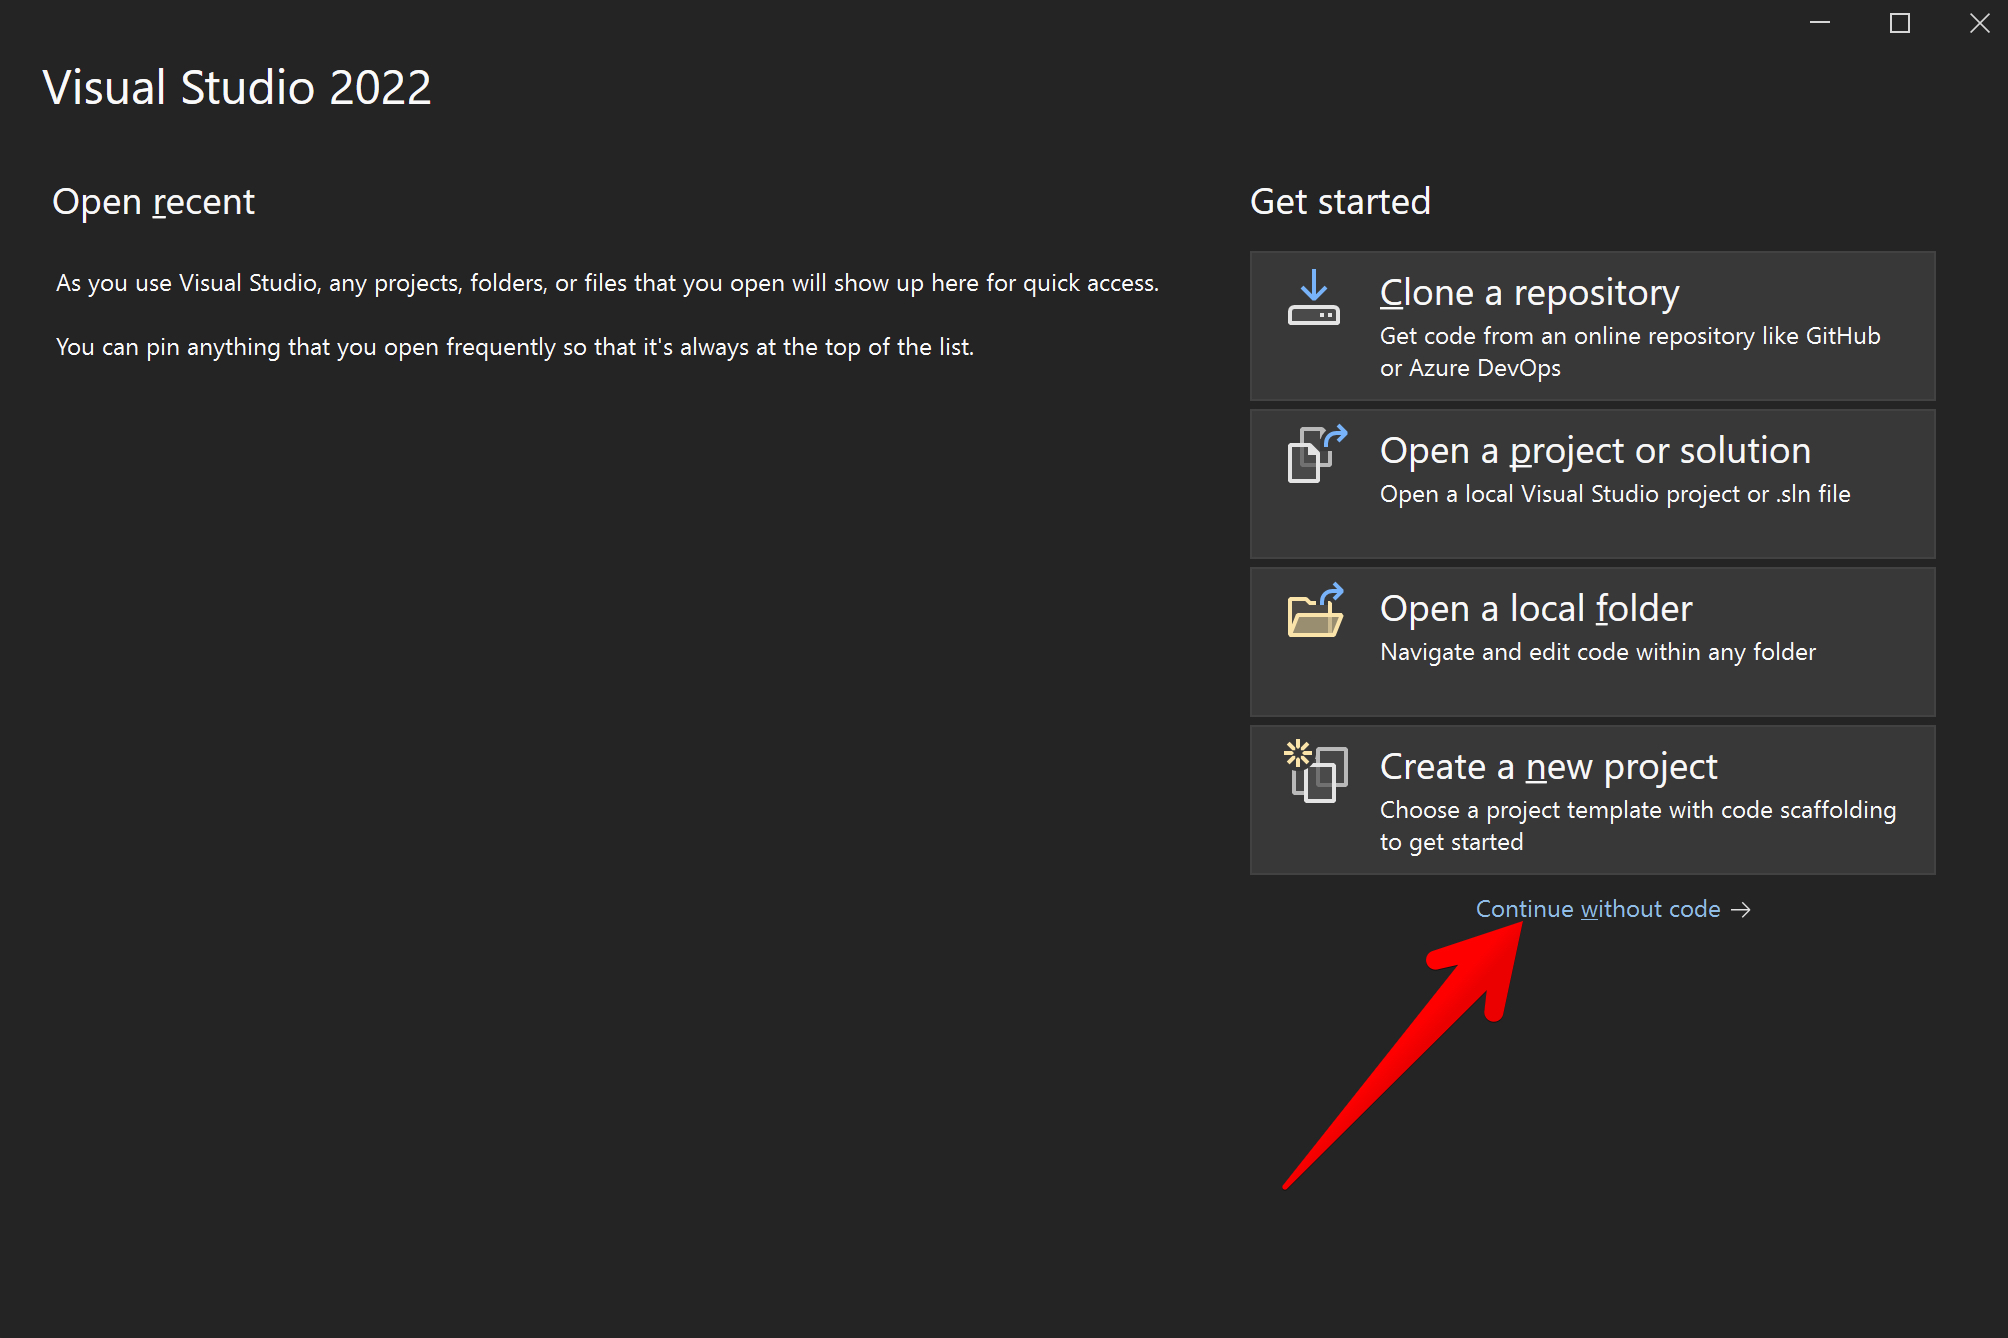
This will bring up this screen (the colors might be different), click on **Continue without code**:
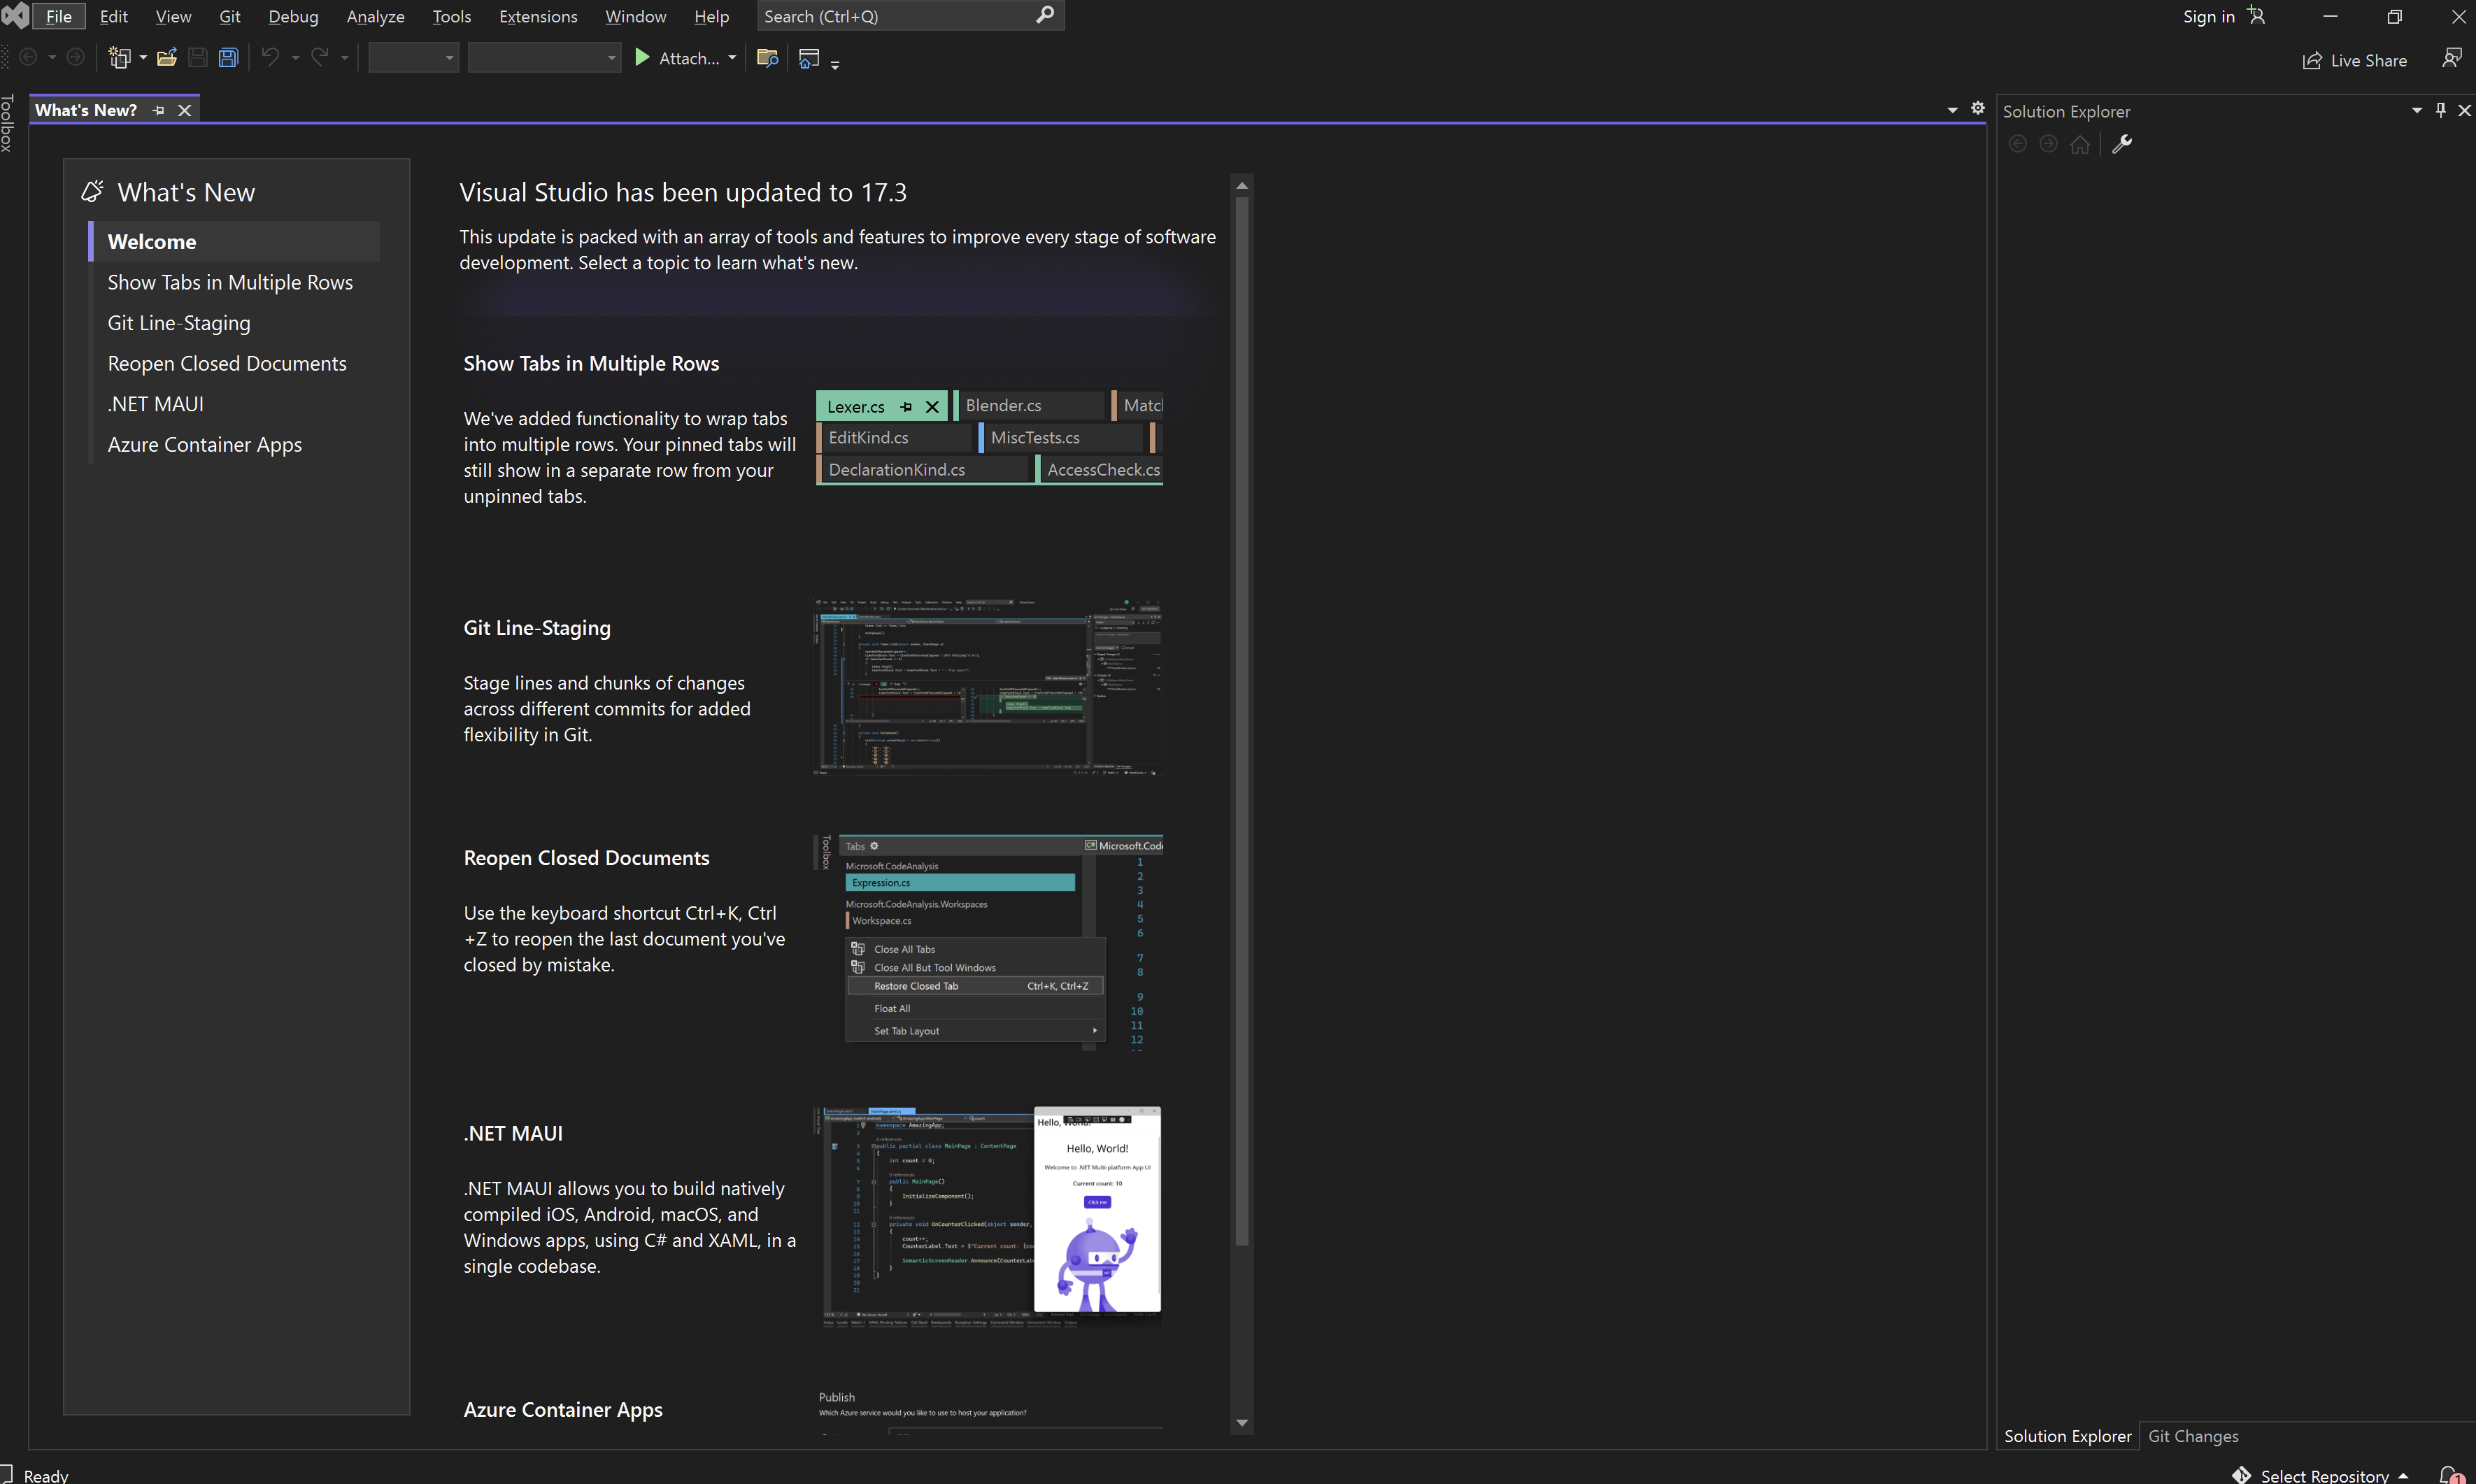
Step 5
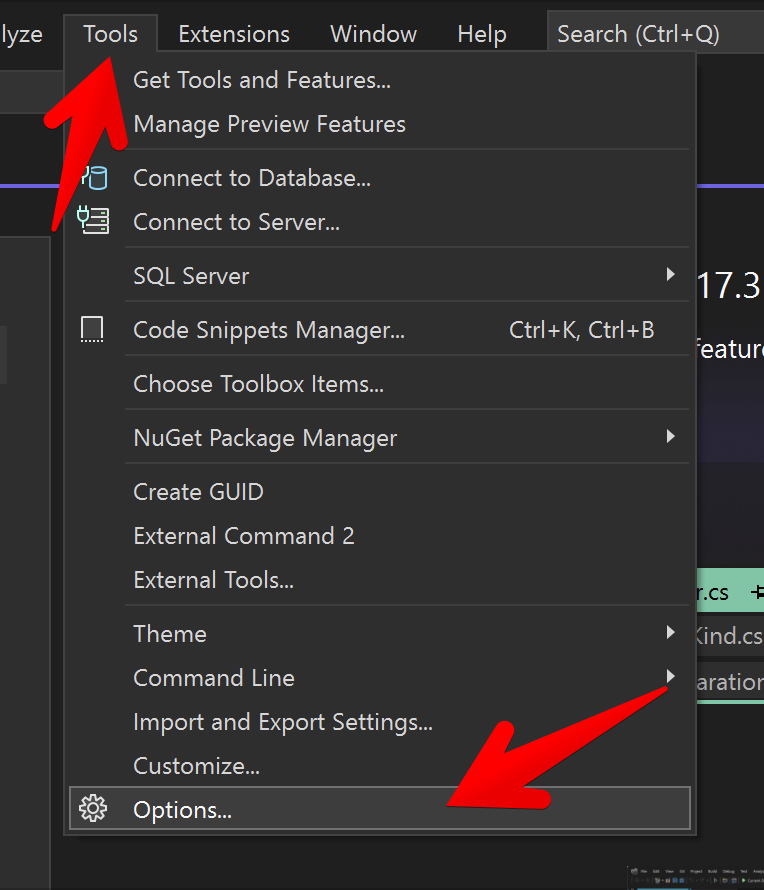
In the menu bar on top, click the **Tools** menu and select **Options**:
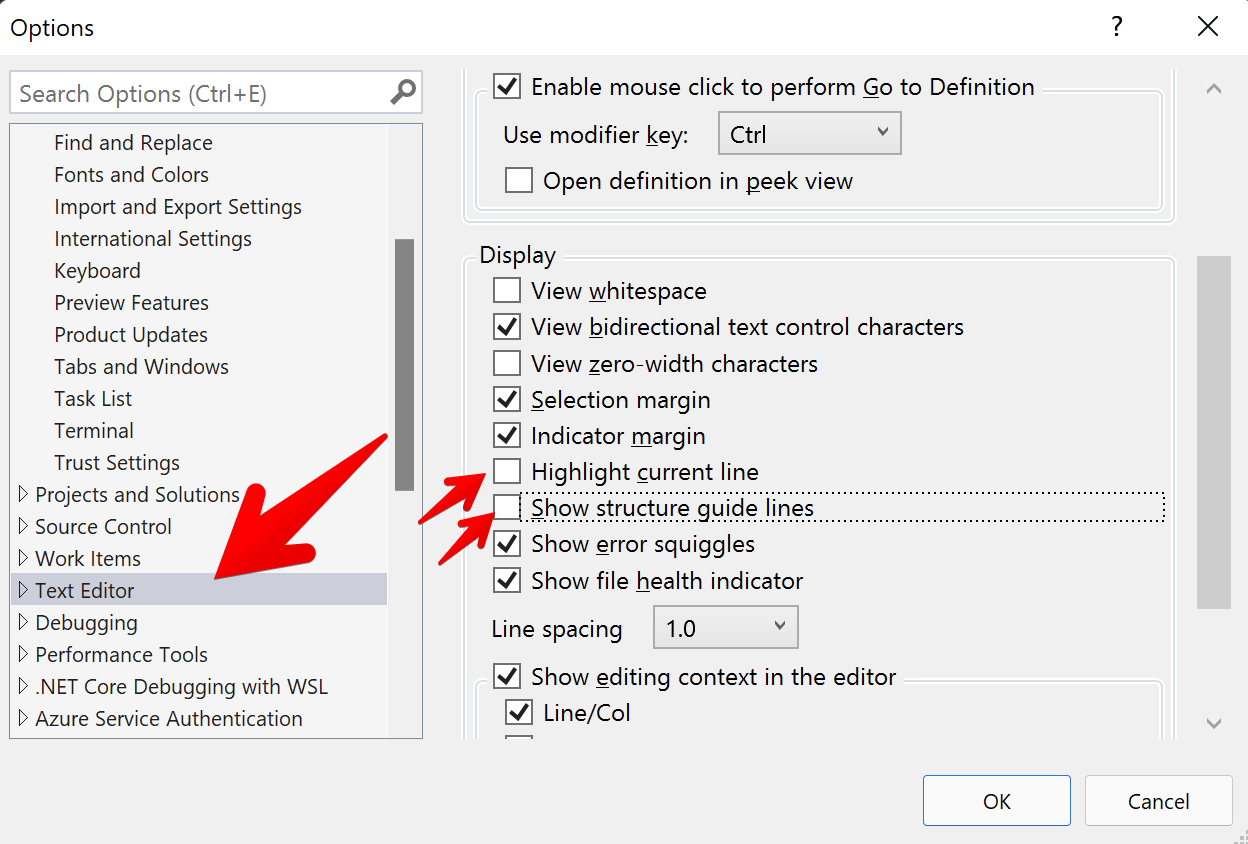
In the dialog that comes up, on the left hand side, scroll down till you see **Text Editor** and click that. Then, on the right side, scroll down and uncheck the options *Highlight current line* and *Show structure guide lines*:
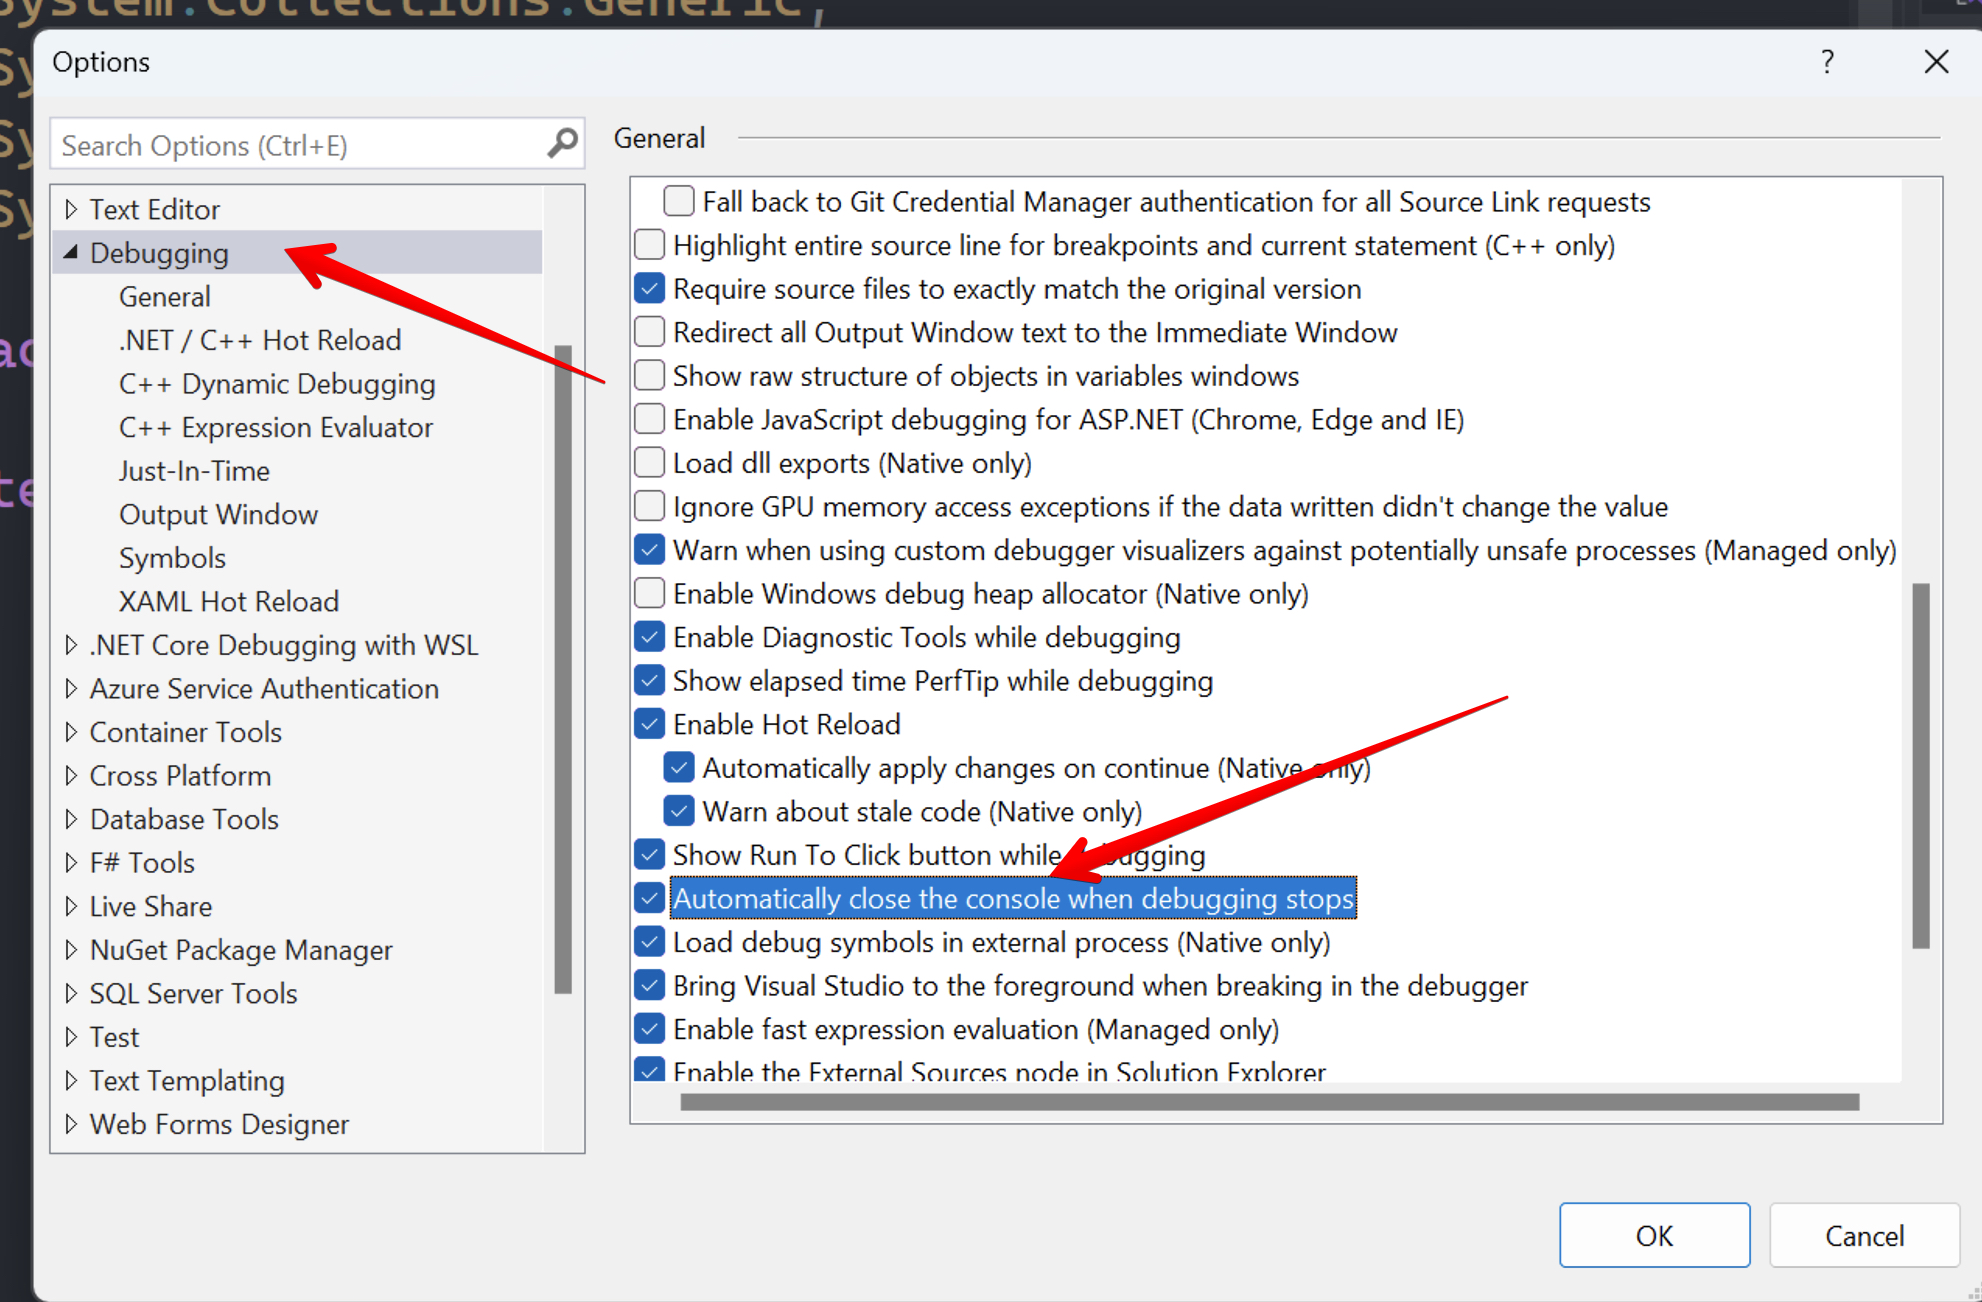
Then, on the left hand side find the section called **Debugging** and click it. In the options section that comes up on the right, scroll down and check the box that says *Automatically close the console when debugging stops*:
Then, on the left hand side, expand **Text Editor** and select **CodeLens**. Then, on the right side, uncheck *Enable CodeLens*:

Now click **OK** on the bottom right as shown above.
Congratulations, you've successfully installed Visual Studio!